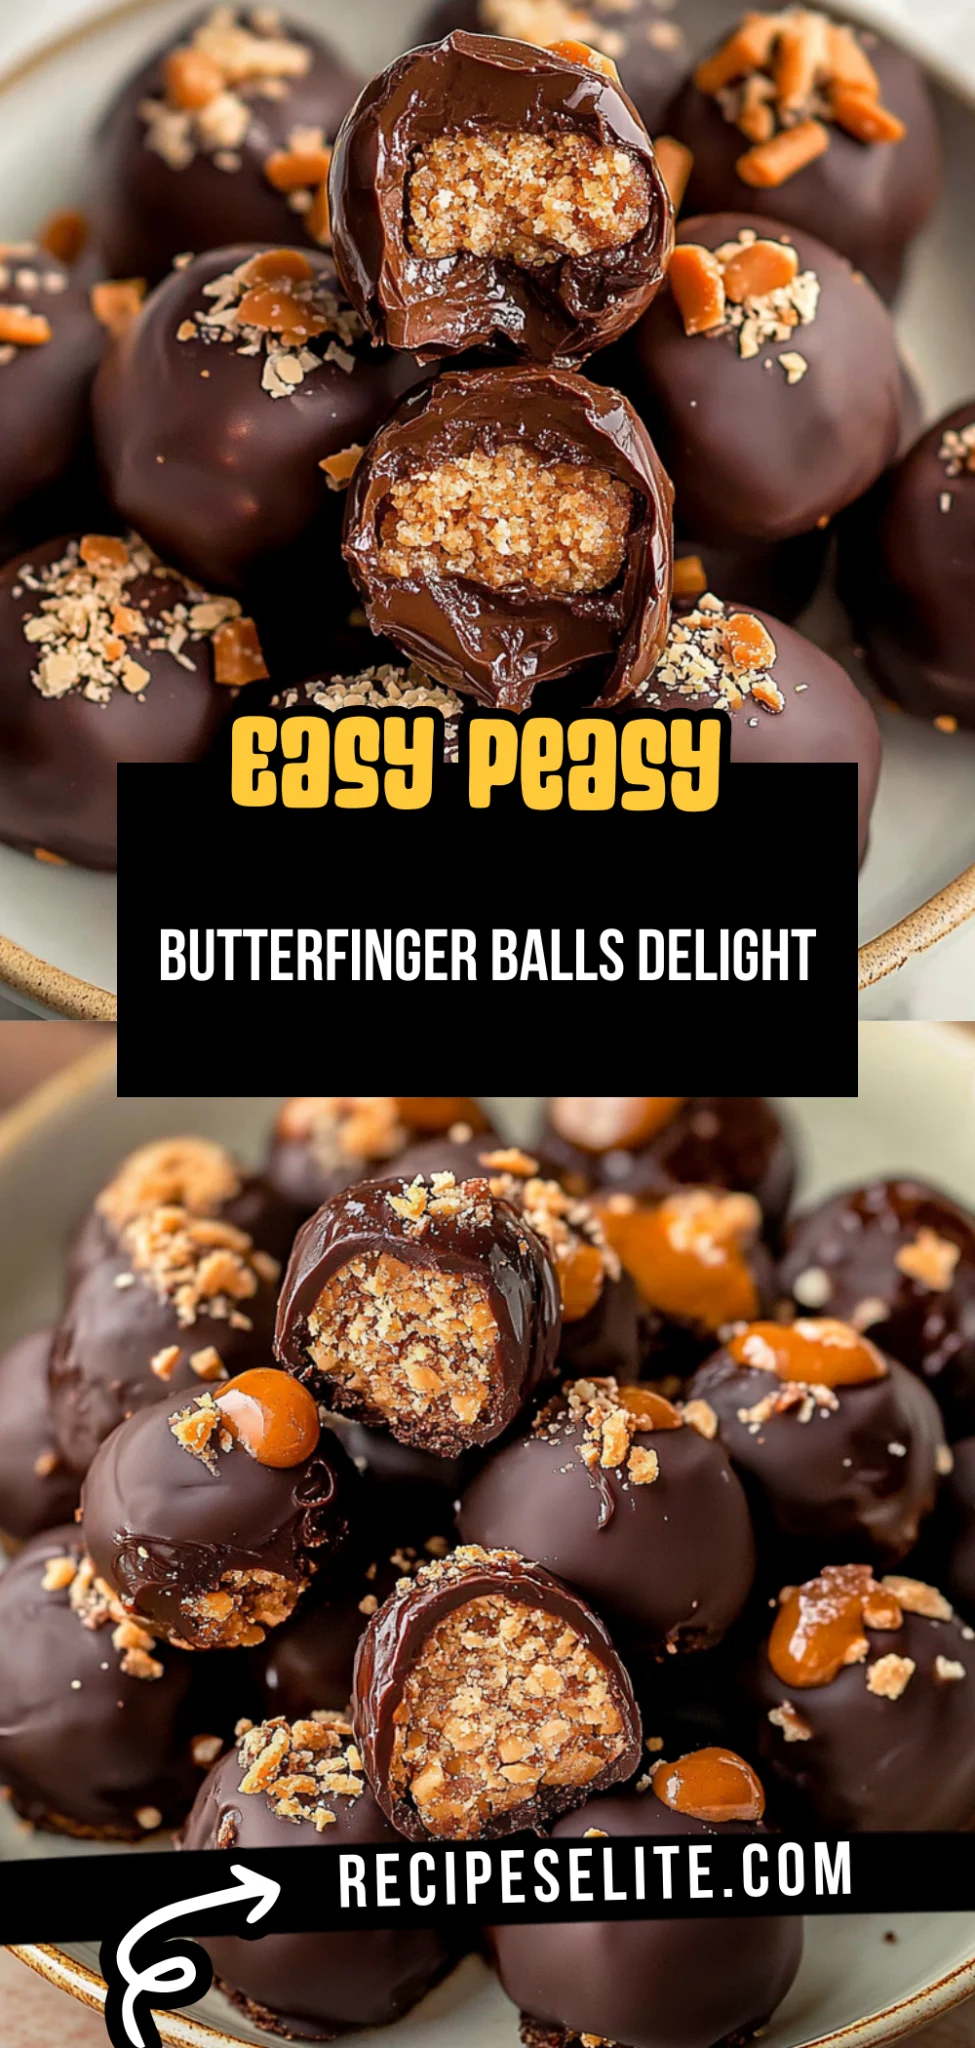
Irresistible Butterfinger Balls: A Quick Treat to Satisfy…
Indulgent Butterfinger Balls made with creamy peanut butter, crunchy cereal, and rich chocolate come together in just 20 minutes—perfect for family fun, gluten-free delight, and satisfying your sweet tooth.
Craving that nostalgic candy bar flavor but want something even better? These Butterfinger Balls are a delightful treat that captures the essence of the classic candy you loved as a kid. Imagine biting into a sweet, crunchy ball coated in smooth chocolate, releasing waves of peanut buttery goodness that wrap you in comfort. They’re quick to whip up in just 20 minutes and require minimal fuss, making them perfect for a fun family activity or an easy dessert to impress guests on a weeknight.
What truly makes these Butterfinger Balls special is their versatility! They’re naturally gluten-free and can be adapted for various dietary preferences—whether you’re looking to satisfy a sweet craving or indulge in a guilt-free treat. I fondly recall making these with my kids on rainy afternoons, laughter filling the kitchen as we rolled the mixture into balls. The joy of creating something delicious together is unmatched! So grab your ingredients and let’s dive into this delightful recipe that’s sure to become a cherished favorite in your home.
What Makes This Butterfinger Balls Special?
This Butterfinger Balls recipe stands out with its irresistible flavor, creamy texture, and the flexibility to customize for various dietary needs. Here’s why you’ll adore it:
One-pan cleanup: Mix all ingredients in one bowl, making post-dinner cleanup a breeze.
Quick to prepare: Unlike traditional candy-making, these delightful balls come together in just 15 minutes.
Keto-friendly option: Substitute regular ingredients with low-carb alternatives for a guilt-free treat while enjoying Butterfinger Balls.
Rich, savory flavor: The combination of peanut butter and chocolate creates an indulgent taste that’ll satisfy any sweet tooth.
Ingredient flexibility: Use different types of nut butter or chocolate to tailor these treats to your liking.
Meal prep friendly: Make a batch ahead of time and store them for quick snacks throughout the week.
- Budget-friendly dessert: With simple pantry staples, you can create gourmet-tasting Butterfinger Balls without breaking the bank.
Ingredient Notes
Here’s what goes into these delightful Butterfinger Balls (no exact amounts here—just what to grab and why):
Butterfinger candy bars (6 bars): The main flavor; their crunchy peanut butter center and chocolate coating give these treats a nostalgic taste.
Cream cheese (8 oz): Adds creaminess and helps bind the mixture; for a lighter option, use Neufchâtel.
Peanut butter (½ cup): Enhances the nutty flavor while providing richness; almond butter works as a tasty substitute.
Powdered sugar (1 cup): Sweetens the mixture and helps achieve the perfect texture; can be replaced with coconut sugar for a healthier twist.
Vanilla extract (1 tsp): Adds depth of flavor that complements the sweet and salty notes.
Chocolate chips (1 cup, for coating): Melted to create a smooth outer layer; dark or milk chocolate can be used based on preference.
Coconut oil (2 tbsp, for melting chocolate): Helps achieve a silky chocolate coating; use vegetable oil as an alternative if needed.
Sea salt (a pinch): Balances sweetness and enhances the overall flavor profile.
Chopped nuts (¼ cup, optional): Adds extra crunch and nuttiness; try using crushed peanuts or almonds as a topping.
Sprinkles (for garnish, optional): Fun way to dress up your Butterfinger Balls for special occasions!
How To Make Butterfinger Balls
Get ready to impress your friends and family with these delightful Butterfinger Balls that come together in no time—perfect for a sweet craving or surprise treat!
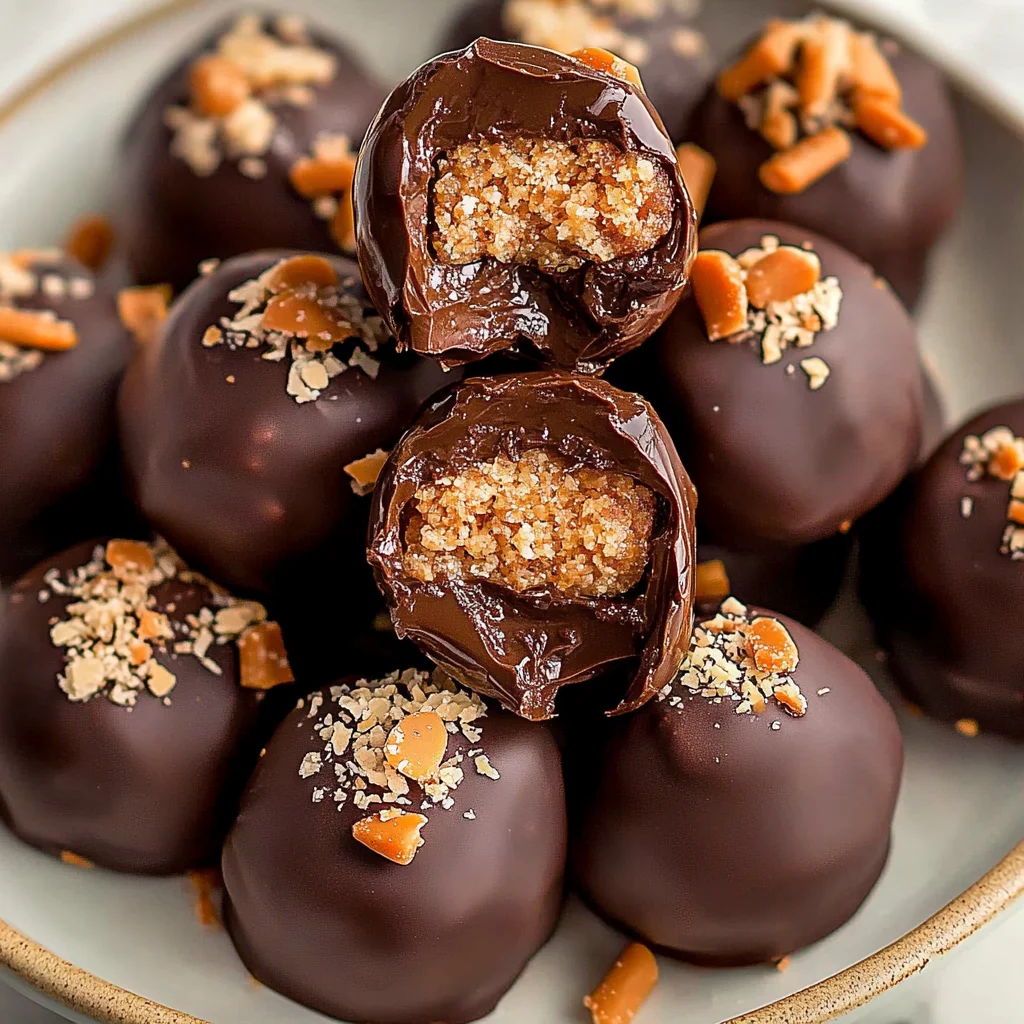
1. Crush the cookies: Start by placing the Butterfinger bars in a zip-top bag and crush them into fine crumbs using a rolling pin. The smell of chocolate will fill the air as you crush!
2. Mix peanut butter and sugar: In a mixing bowl, combine the crushed Butterfinger crumbs with creamy peanut butter and powdered sugar until well blended. The mixture should be thick but pliable.
3. Form the balls: Use your hands to scoop out small portions of the mixture and roll them into 1-inch balls. They should feel slightly sticky but hold their shape well.
4. Chill the balls: Place the formed balls on a parchment-lined baking sheet and pop them in the fridge for about 30 minutes, allowing them to firm up nicely.
5. Melt chocolate coating: While waiting, melt milk chocolate chips in a microwave-safe bowl in 30-second intervals, stirring until smooth and glossy—about 1-2 minutes total.
6. Choose your path: For keto, substitute regular peanut butter with a sugar-free version and use unsweetened chocolate for coating. For classic, stick to the standard ingredients.
7. Coat the balls: Dip each chilled ball into the melted chocolate using a fork, allowing excess chocolate to drip off before placing them back on the parchment.
8. Chill again: Return coated balls to the fridge for another 15-20 minutes for the chocolate to set completely.
9. Garnish and serve: Once set, drizzle any leftover melted chocolate over the top or sprinkle with crushed nuts for added texture. Serve chilled and enjoy!
Pro Tips
Chill the mixture: Refrigerate the Butterfinger Balls mixture for at least 30 minutes before shaping. This firming step prevents them from falling apart when you roll them into balls.
Use crunchy peanut butter: Opt for crunchy peanut butter to add texture and enhance the flavor profile. The added crunch complements the creamy chocolate coating perfectly.
Balance sweetness: A pinch of sea salt can elevate the sweetness of the Butterfinger Balls, creating a more complex flavor. It helps to round out the taste, ensuring it’s not overwhelmingly sweet.
Enhance with vanilla: Adding a splash of vanilla extract can deepen the overall flavor of your Butterfinger Balls. This little addition works wonders in elevating the dessert experience.
Make it saucier: If you prefer a gooey consistency, blend in a little cream cheese or Greek yogurt to achieve a thicker filling. This adjustment adds richness and a delightful tang.
Storage tip: Store your Butterfinger Balls in an airtight container in the fridge for up to two weeks. For longer freshness, consider freezing them; they thaw beautifully without losing texture.
- Keto-friendly option: Substitute regular peanut butter with a sugar-free alternative and use keto-friendly sweeteners. This way, you can enjoy guilt-free Butterfinger Balls that align with your dietary preferences.
Variations & Substitutions
Feel free to personalize your Butterfinger Balls recipe. Here are some fun variations and substitutions to try:
Nut butter alternative: Use almond or cashew butter for a different nutty flavor that complements the chocolate.
Gluten-free option: Ensure you use gluten-free graham cracker crumbs or substitute with crushed gluten-free cookies.
Adjust sweetness: Modify the sweetness by using dark chocolate instead of milk chocolate for a richer taste.
Low-carb version: Replace graham cracker crumbs with crushed nuts like pecans or almonds for a keto-friendly treat.
Add coconut: Mix in shredded coconut for a tropical twist that pairs wonderfully with the chocolate and peanut butter.
Extra crunch: Fold in chopped peanuts or crispy rice cereal for added texture and crunchiness.
Flavor infusion: Experiment with flavored extracts, like vanilla or mint, to give your Butterfinger Balls a unique taste profile.
Dairy-free option: Use dairy-free chocolate chips and coconut oil to keep it creamy without any dairy ingredients.
These Butterfinger Balls are versatile, easy to make, and perfect for satisfying your sweet tooth. Whether you prefer classic flavors or want to try new twists, these treats offer endless possibilities. Enjoy the comfort of this no-bake dessert on repeat!
Butterfinger Balls Recipe FAQs
What type of peanut butter is best for Butterfinger Balls?
For the best flavor and texture, I recommend using creamy peanut butter. It blends beautifully with the crushed Butterfinger bars to create that signature taste. If you’re looking for a healthier option, natural peanut butter works too, though it may yield a slightly different consistency.
How should I store my Butterfinger Balls?
You can store your Butterfinger Balls in an airtight container at room temperature for up to 3 days. If you want them to last longer, refrigerate them for up to a week. Just make sure they’re tightly sealed to keep those delicious flavors intact!
Can I freeze Butterfinger Balls?
Absolutely! To freeze your Butterfinger Balls, place them in a single layer on a baking sheet until firm, then transfer them to an airtight container or freezer bag. They can be frozen for up to 3 months. When you’re ready to enjoy them, let them thaw in the fridge for a few hours or on the counter for about 30 minutes.
What should I do if my mixture is too crumbly?
If your mixture is too crumbly and won’t hold together, don’t worry! Simply add a touch more creamy peanut butter or a bit of honey. Mix well until you reach the desired consistency. This will help bind everything together nicely without compromising that delightful flavor.
Are there any dietary alternatives for Butterfinger Balls?
Certainly! If you’re looking for gluten-free options, ensure you use gluten-free powdered sugar and check that your peanut butter is certified gluten-free. For a vegan version, substitute regular butter with coconut oil and use dairy-free chocolate chips for coating; they work wonderfully!
How can I make my Butterfinger Balls look more appealing?
To give your Butterfinger Balls an extra pop of color and elegance, consider drizzling melted chocolate over the top after dipping them. You could also sprinkle crushed nuts or additional crushed Butterfingers on top before the chocolate sets; it adds both visual appeal and texture!
Butterfinger Balls
Ingredients
Method
- Start by placing the Butterfinger bars in a zip-top bag and crush them into fine crumbs using a rolling pin.
- In a mixing bowl, combine the crushed Butterfinger crumbs with creamy peanut butter and powdered sugar until well blended.